Print This Recipe


Print Friendly and PDF

Wednesday, March 29, 2017

Vanilla Sour Cream Coffee Cake with Streusel Topping

We love coffee cake, but we love the streusel topping even more. This cake has a double helping of streusel on top!


Topping

1 cup all-purpose flour
3/4 cup packed brown sugar
3/4 cup granulated white sugar
6 tablespoons butter, softened
1 tablespoon ground cinnamon
1/8 teaspoon salt

Cake

1 yellow cake mix
1 cup sour cream
1/2 cup butter, melted
4 eggs

Glaze

1 cup powdered sugar
2 to 3 teaspoons milk
1/4 teaspoon vanilla

Preheat oven to 350 degrees. Spray a 13 X 9 pan with cooking spray.
In medium bowl, stir Topping ingredients until crumbly. Set aside.


In large bowl, stir Cake ingredients until blended. Pour into 13x9 pan. Sprinkle topping over cake. Bake for 30 - 45 minutes  or until toothpick inserted in center comes out clean.

Transfer to a cooling rack. Let stand 10 minutes. In small bowl, beat Glaze ingredients until smooth. Drizzle over cake.


Shared on Meal Plan Monday

Tuesday, March 28, 2017

March Food In Jars Mastery Challenge ~ Jellies and Shrubs

A group of us are participating in the Food In Jars Mastery Challenge hosted by Marisa at Food in JarsThe March challenge was Jelly or Shrubs.

While just about everyone gets the concept of jams and jellies, Shrubs were a mystery to me even though I did bartend for a while. They were not popular back then, or the places I worked were not "upscale" enough to know about them. They are a very old concept from the days before refrigeration, but shrubs are making a comeback! 


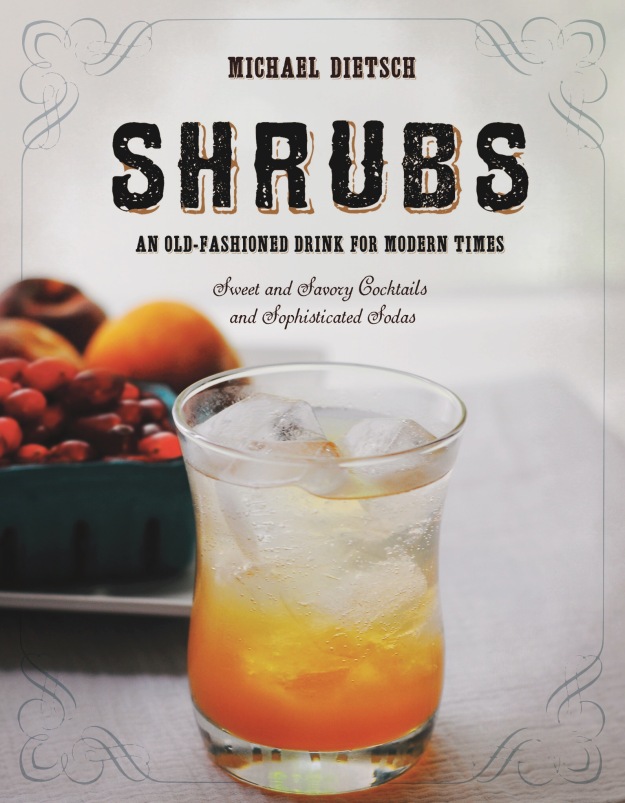
So, what does the word, shrub, mean, exactly? Michael Dietsch explains in rich detail the history of shrub-making, which dates way beyond Colonial times, in the pages of his recent book, Shrubs: An Old Fashioned Drink for Modern Times. A shrub is basically fruit, or even vegetables, combined with two other components: sugar and vinegar. After the correct ratio of those ingredients integrate over a little time, the result is a perfect balance of tartness, sugar, acidity, and texture. Shrubs are mouth-watering and concentrated, and they taste amazing when combined with soda, water or integrated into a cocktail.
how to make shrubs | holly & flora

I stuck with jelly since none of my gang would even begin to try the shrubs. It would be a waste and a shame to make a product to take a picture of and throw it away. I'll wait until our Adult Easter Egg Hunt ~ Spring Fling Party to make some Shrubs and get the big kids to try them! I'll keep you posted!

Check out our results!
Click the links below the pictures for the recipes:


Satsuma Mandarin Orange Pepper Jelly  - Mary Marshall -
Cooking with Mary and Friends
Recipe


Balsamic Vinegar Jelly with Onions Seeds - Sue Harris -
Jams 'n' Pans
Recipe


Cantaloupe, Orange and Coriander Shrub - Pamela Gram -
The Pitt Stop BBQ, LLC
Recipe


Pepper Jelly - Anne Marshall-Candeloro
Recipe


Pomegranate Molasses Shrub - Nikki Carriere
Recipe


Porter Beer Jelly - Sue Burns -
It's Ok to Eat the Cupcake
Recipe 
Mango, Szechuan Peppercorn, Kaffir Lime Leaf Shrub -
Tami Young -
Recipe


Cherry Jelly - Lynn Vining -
Southern with a Twist
Recipe


Monday, March 20, 2017

Cherry Jelly ~ March Food in Jars Mastery Challenge

I am participating in a year long Food In Jars Mastery Challenge hosted by Marisa from Food in Jars, and the March challenge was Jellies and Shrubs! Since my family and I really aren't into the Shrubs, vinegary concentrated drinks, I decided to stick with jelly, but I used my cherries from last years crop to make jelly. I've never made Cherry Jelly before. It is sweet, tart and delicious!


My cherries were frozen. I rinsed them off and set the colander on the base after they drained well. I let them thaw. I removed the pits over the colander, yielding about 4 - 4 1/2 cups of cherries. 


The base caught 3/4 cup of cherry juice! I cooked the cherries after adding Sure-Jell (I didn't need to add water since the base of my colander caught the juice. I boiled them and then added the sugar. I boiled them for a few minutes to yield the most juice. I used the colander and base again to separate the cherries from the jelly juice. I filled the jelly jars and processed them.


Jelly juice...
I skimmed off the foam.

Jelly done! Recipe below...
I reserved the cherries for chutney.


6 cups cherries, stemmed and pitted
  (Note that you are only using the juice for jelly which will yeild about 3 1/2 cups of juice)

1/2 cup water*
Sure-Jell
4 1/2 - 5 1/2 cups granulated sugar**

Stem and pit the cherries. Place cherries water and sure-jell into a large stock pot. Stir until the sure-jell is dissolved and cook over medium to medium high heat. Bring to a boil. Add all the sugar at once and return to a boil. I let mine cook down for about 10 minutes. Remove from heat and carefully strain the cherries and reserve them for some chutney or jam. Spoon the juice or pour into jars. I yielded 3 half pints and a 4 ounce jar from this batch. You can either process the jars of preserves in a water bath for 10 minutes, or store in the refrigerator. 
* I used frozen cherries from last year's batch, so I didn't need to add water. If you use fresh cherries, add a little water to dissolve the sure-jell and start the process of breaking down the cherries.

** 
Depending on how ripe the cherries are, you may use more or less sugar. These cherries are a little tart, so I used about 4 1/2 cups. Taste and adjust the sugar.


Friday, March 10, 2017

Simply Citrus and My Meyer Lemon Tree

About a week ago I received this message:

"Lynn, CONGRATULATIONS you have won the drawing for the Meyer Lemon Tree from Simply Citrus Nursery. Give us a call for a time to pickup your new tree."

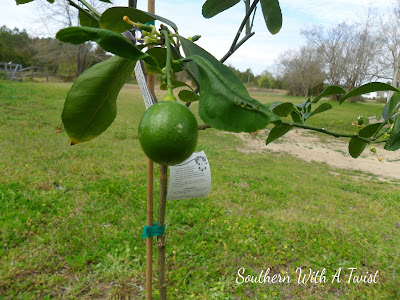
I cannot tell you how excited I was and still am. I was at home watching the girls while their parents attended a funeral, so the Hubby went in my place to accept my tree. We have been talking about adding more fruiting trees to the property and this is perfect! He also got the full tour of the nursery! Here are a few pictures of the Hubby and Ben. (Mary is behind the camera.) Thanks Ben and Mary for your hospitality and the beautiful Meyer Lemon Tree! It has found it's forever home and is happy beside the pond.


 Ben and the Hubby (AKA Craig)
and our Meyer Lemon Tree!

 Beautiful Oranges!

 Citrus Trees
 More Oranges!
Craig took these pictures with his phone.
I think it was a bad time of day.
Sorry they are a little blurry.

More fruit trees!
About Simply Citrus:
We are a small, family owned Citrus Nursery that began as a hobby and turned into a full time business. We serve the public homeowner, primarily in the Columbia, SC and surrounding area. We offer a wide selection of Citrus varieties, mostly Satsuma types and a small selection of unusual plants and trees. I have been working with citrus since 2000 and have educated myself with the help of friends and research. I try to be as knowledgeable as possible about our products, and experience is a good teacher. We have lemons, limes, navel oranges, mandarin oranges, kumquats and several more. 


Our Meyer Lemon Tree beside the pond...

 Blossoms and baby lemons!

 Here's a BIG baby lemon!

This tree is loaded with fruit!

 I am loving this tree!
Thank you so much Ben and Mary at Simply Citrus!
Please click on the link above ........ ^^^
for more information on their
nursery and their trees! 


PS... My son, Elliott freaked out a little with the blood orange. He asked if the orange was still good. I told him, "It's a blood orange." He looked at me sideways and said, "Blood Orange? Is it ok to eat? Will it hurt me? Not hurt me, but... Is it good?" Goofball! I have never tried one, so I could not give him a lot of information. I said, "If you don't trust it, google it!" He started to peel it and the look on his face said it all! (Cool!) He was grinning the entire time he was peeling it!


He says, "Yep! Looks like blood!" His opinion... "It's different, kind of hard to explain. It taste like an orange with a little grapefruit flavor." That's my boy!

PSS... Mary and Ben...Congratulations on getting Craig to try a kumquat! He's never eaten one, and I've never been able to get him to try one!


Tuesday, March 7, 2017

Bacon Egg and Cheeseburger on a Tater Tot Waffle Bun


I was looking for a picture today and ran across this one. I know what some people will say, but I don't make this one often. My hubby loved it and would love one every week! I dusted off the waffle maker and used tater tots to make a waffle bun**. Thus the Bacon, Egg and Cheeseburger on a Tater Tot Bun was born... at my house at least! Here's a good, but different burger mix to incorporate some sausage into your burger.

Beef and Pork Burger Patties

1lb Italian Sausage, de-cased
1lb ground beef

Salt, Pepper and Garlic Powder
16 small 
slider buns, dinner rolls or Tater Tot Waffle Bun

Onion, diced very small
2 cups cheddar cheese, grated

In a large bowl, combine sausage and beef. Using your hands, blend the two meats together.* Spread the onions on a heavy duty cookie or baking sheet. Using your hands, crumble and spread the meat mixture over the onion and press down. If you try to spread it by pushing the meat, the onions move and gather on the ends. Sprinkle generously with salt, pepper and garlic powder. Bake in a 375 degree oven for about 15 minute. Cooking time will vary according to your preferred doneness. Internal temperature should be 160˚F for medium. Remove from the oven and pour off the excess grease. Sprinkle with cheese and return to oven long enough to melt the cheese. Let rest for a minute, then slice into squares using a pizza cutter or knife. Slice the rolls and top the sliders with your favorite condiments. 

*Or form into patties and cook or grill. Use the burgers as the base on a tater tot waffle and top with bacon and egg.

** For the waffle bun...
Defrost some tater tots a bit. Preheat your waffle maker. Spray down top and bottom with cooking spray. Place tater tots on the cooking surface on the bottom. Close tightly and lock. Cook until golden brown as pictured above.


Saturday, March 4, 2017

Cherry~Apple Jalapeno Chutney

This month in the Food in Jars Food Mastery Challenge, we are featuring jellies and shrubs. I made Cherry Jelly, so I saved the actual cherries and used them in this chutney! Think about Easter and the Lamb and Mint Jelly combo you've always heard the hype about? How about Lamb (or pork loin, ham or chicken) and this Cherry~Apple Jalapeno Chutney?!?


 Cherries strained from the jelly.

Since the cherries had already cooked down in the jelly,
I combined the other ingredients to cook down and soften. 


... then I added the cherries.

Take out the cinnamon stick before canning.

 It looks like this when it's finished.
You can see a bit of jalapeno sitting on top of an apple in the picture.


Cherry~Apple Jalapeno Chutney

1lb cherries, pitted, coarsely chopped
1 cup firmly packed light brown sugar
1 tart apple (such as Granny Smith), finely chopped
2 or 3 chopped jalapenos, or to taste
1/3 cup cider vinegar
3/4 teaspoon mustard seed
1/4 teaspoon allspice
1(4-inch) cinnamon stick

In 3-quart saucepan, combine all ingredients; stir to combine. Bring to a boil over high heat.

Reduce heat to medium-low; boil gently 50 to 60 minutes or until thickened, stirring occasionally. Remove and discard cinnamon stick. Cool at least 1 hour before serving. 

Process in a boiling water bath for 15 minutes. Remove jars and allow to cool 24 hours on a towel on your kitchen counter-top. Store jars in the pantry up to one year. Opened jars need to be refrigerated.